Hi Everyone,
In this blog I am going to demonstrate the usage of Docker IntelliJ IDEA plugin and how this plugin can help to manage dispatcher related tasks in one window rather navigating through terminals, typing commands , open vim editors to check the cached content etc.
Prerequisite:
Please refer the below repository to set up Dispatcher / Apache on your local machine.
https://github.com/vivekdhiman/dispatcher-docker-setup
Below are the steps to work with Docker Plugin within IntelliJ IDEA.
Step 1
Install latest docker plugin from Marketplace, if you already have, make sure its updated one. This feature is tested on IntelliJ IDEA version 2019.2.4 (Community Edition)
Restart the IDE.
Step 2
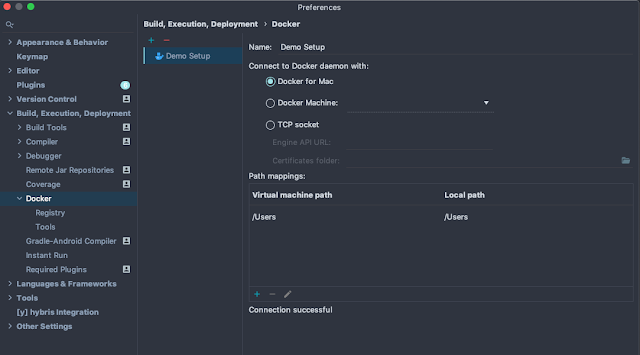
Create initial configuration as per you docker instance. In intelliJ this can be done under Build and Deployment section as below. Just Click + sign and add details.
Connection successful represents, you plugin has been established a successful connection with you local docker instance.
Step 3
Under the Services console window of IntelliJ, Docker instance will be display with several menu options as shown below.
Click the Start option. Expand the Docker option. This will list the containers and images under your docker instance.
Step 4
Map the DockerFile to the deployment configuration of docker instance.
Add below in the configuration window. These configurations can be changeable as per project's naming conventions.
- Docker File Path
- Image Tag
- Container Name
- Bind Ports
- Host Port : 8080
- Container Port : 80
- Protocol : tcp
- Host IP : 0.0.0.0
- Environment Variables
- HOSTIP=XXX.XXX.X.XXX (This IP will be based on your network. Use command ipconfig getifaddr en0 to get the value in mac)
Please refer below screenshot and click on run button. Or you can use the context menu to run that.
You can also view the complete command in command viewer.
Please Note : HOSTIP should map exactly same in dispatcher.any file under /renders
Step 6
After running the docker instance with the configuration provided above. you can view the container and docker images created.
There are various options in the right pane which can help to analyse logs and troubleshooting. If container is in green color, it means its started and active.
Step 7
Hit the URL http://aem.dispatcher-dev:80/ , you should be able to see 404 page. This means setup is completed by using docker plugins.
Please Note : There is host entry in your machine with
127.0.0.1 aem.dispatcher-dev
Additional Info
- To rebuild and deploy the updated configuration, Just deploy the existing configuration that you have created from context menu under services tab. Before that, please make sure Docker instance is stopped, only then menu options will be visible.
Advantages of using Docker Plugin
- User can manage the docker container such as build image, creating container, deploy configuration etc. in span of time within from IDE.
- User can check the logs from the same page to see incoming requests.
- Quickly access cached content and verify the content. Check markup within IDE. Just double click on the file.
- Use shell commands within container. Navigate to running container and right click, select option Exec , select Create.. and the rm type command such as rm -rf /Library/WebServer/docroot/publish/etc.clientlibs to clean the client libraries.
- These commands are store in cache of container so do not need to retype again.
- To view the changes reflected on cached files, you need to refersh publish folder


